
A DIY solar system can be a great way to reduce your reliance on the electrical grid and save money on your energy bills. But before you begin the installation, you need to plan out your system.
Understanding the components you’ll need, the types, size, and where to install them are just parts of that plan.
This DIY Solar System guide provides the first steps in laying out your system by describing the primary components and asking essential questions you will need to answer before getting started.
Most importantly, this article will help you determine how to get started and whether or not you want to tackle the project on your own, with a Solar System Kit, using a professional installer, or in some cases, even at all.
Table of Contents
What is a DIY Solar Power System?
A DIY solar panel system is a solar energy system that you install yourself. The three primary components are solar panels, inverter, and battery bank. Of course, there are additional components, but these three are required for a system to work and are usually the most expensive.
We have summarized these components, but additional details are provided later in this article.
- Solar panels convert sunlight into electricity and will likely be one of the most expensive components.
- Inverters convert electricity into AC power that you use to power your home and appliances.
- Batteries store electricity panels convert sunlight into electricity, the inverter converts the electricity into usable AC power, and the batteries store extra electricity for later use.
Other components will be added to your system as you lay out the plan – charge controller, racking, wiring, fuses, power panels, etc.
Your system can be complex or straightforward but creating a sound base system that is efficient and grows with you over time. You don’t want to invest thousands of dollars in reaching the capacity of the components you have chosen in a short period.
Ultimately, you may also decide that you want to attach your DIY Home Solar System back to the grid and sell back some of your power. If this is the case, you will need additional equipment.
Advantages & Disadvantages of a DIY Solar System
There are advantages and disadvantages to installing your DIY solar system.
Advantages
- Once your system is paid off, you will save money generating your electricity.
- You will have a positive impact on the environment, although some argue that the effects caused by producing solar panels and other equipment offset some of the savings.
- Choosing your solar components for a solar power system is generally less expensive than completing a full installation.
Disadvantages
- Installing a system and handling electricity can be dangerous. Make sure you understand the equipment and use an installer if not.
- Solar systems can become expensive, so planning and understanding are essential.
- A professionally installed system may be more expensive, but it may last you longer.
- Components can become expensive. This is another reason to do planning and research.
- If you are building a system for your home, you will need to understand local permit requirements.
How Do I Determine the Size of Solar System I Need?
The first step in your planning process is determining what size system you will need based on your energy needs.
First, determine your energy usage.
- Take a look at your electric bill to see how many kilowatt-hours (kWh) of energy you use each year. Most electric companies list this on your monthly account.
- Use an energy monitor to determine the energy usage for your appliances and electronics.
- Review the “Energy Guide” stickers on your equipment.
- Use an energy calculator to determine the energy usage for your appliances and electronics.
Use these calculations to determine your kWh if doing it by the appliance and not using a calculator.
- Determine the number of hours used daily – lights, microwave, coffee pot, air, etc.
- Determine the wattage of the appliance. Wattage and amperes are often stamped on an appliance. If wattage is not stamped on the appliance, then use amperes times voltage to get an estimate (Watts (W) = Volts (V) x Amps (A). These are also often in the specification guide or online. In addition, there is documentation online that provides estimates, like Energy Star.
- Finally, to calculate the kWh for a specific appliance, multiply the power rating (watts) by the amount of time (hrs) by the time the machine is used and divide this by 1000.
Below is a popular video that guides you through determining your solar energy needs.
Peak Sunlight Hours (Irradiance)
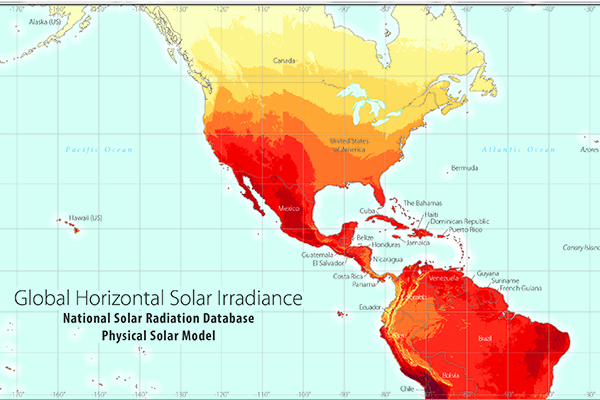
Different parts of the country receive different amounts of peak sun hours. The irradiance map below illustrates the regions and their peak sun hours.
Insert map here.
Knowing your peak sun hours or the number of hours in which the sun shines directly down on your solar panels is essential.
Energy Loss
There will always be some energy loss. It can range anywhere from 20% to 30%. It includes the following factors.
- Shade over solar panels
- Dirt on solar panels
- Thermal (seasonal temps.) loss
- Reflection
- Cable losses
- Inverter loss
- Irradiation loss
Size Solar System Summary
You can determine your solar system size once you know the watt-hour usage for your appliances and electronics, peak sun hours, and loss factor.
Example – You add the watts for each appliance times the hours used. Once you add all your appliance totals, you have 1,500watt-hours per day. Add 30% for loss or 1,500 x 1.30.
This is 1,950watt-hours or 1.95 kWh. Once you know this number, you can apply your peak sun hours 1,950 watt-hours/4 hours = 487.5 watts-peak, the panel specifications, and determine the number of panels you need.
Should I Use a Solar Panel Kit or Not?

A solar panel kit pre-packages the components you need for a complete solar power system. It’s designed to make installation easier and quicker, theoretically lowering your costs by bundling the parts you will need.
DIY solar system kits should include the materials you need to install your system. That includes panels, racking for the solar panels, wiring, connectors, batteries, charge controllers, inverters, etc.
Every kit is different, so make sure you review each one in detail before placing your order. Also, many of them only have specific components, and you will have to purchase what you need, i.e., batteries, chargers, etc.
Accessories like wiring, fuses, tools, etc., are often not included in a kit.
One downside to using a kit is that you may not have as much flexibility regarding what type of system you can install or where it’s placed on your property. You’re also limited to the brands and models the kit provider offers.
Another consideration is the warranties for the equipment you choose. You probably won’t have the same warranties on components in a kit that you will if you buy them individually.
Consider assembling your own DIY solar panel kit if you have time and want more control over your solar installation.
This gives you the flexibility to pick components best suited for your home and energy needs and customize the type of system you want to install.
Solar Panels
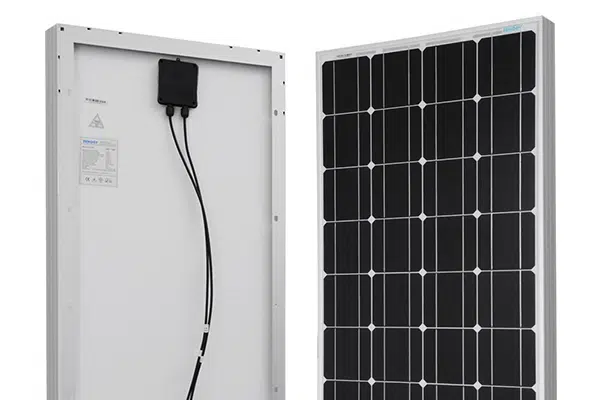
As mentioned earlier, a solar panel converts the sun’s energy into DC.
There are two basic types of solar panels – monocrystalline and polycrystalline.
- Monocrystalline panels are more efficient and usually more expensive.
- Polycrystalline panels are less efficient and less expensive.
The efficiency of a solar panel indicates how much sunlight it can absorb and turn into energy as a percentage of the total amount of fuel available.
The type and size of your solar panels will probably depend on your budget and use the panels. For example, you probably want a smaller, more efficient panel if you don’t have much space for panels.
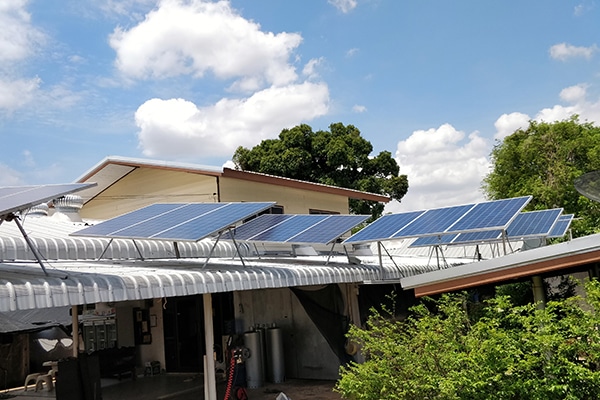
Knowing how to install your solar panels is essential. They must be installed to receive the most direct sunlight over an extended period.
When installing your solar panels, there are two types of racking, roof-mounted and ground-mounted. Roof-mounted racks attach directly to your roof, but you can also install ground-mounted shelves.
Ground-mounted racks are a better option if you have space on your property, as you can install them in an open area. They are also easier to maintain and repair than roof-mounted racks and won’t potentially damage your roof.
Charge Controller

A charge controller regulates the energy flow between your solar panels and batteries, preventing solar panels from overcharging batteries. Charge controllers also protect against the reverse current, which occurs when there is no power demand at night and electricity flows back into your solar panels instead of staying in your battery bank.
A charge controller is usually used on 12 or 24-volt systems.
There are two basic types of charge controllers – MPPT (Maximum Power Point Tracking) and PWM (Pulse Width Modulation).
- PWM Charge Controllers are less expensive and complex than MPPT charge controllers. They monitor battery voltage and determine how much energy can be fed into them before shutting off.
- MPPT Charge Controllers monitor panel currents and maximize the current’s efficiency to the batteries. As a result, an MPPT controller can deliver up to 30 percent more AMPS than a PWM controller.
Solar kits often include a charge controller, which does not want to cut corners. Make sure you purchase a charge controller that can handle more than the watts needed. You don’t want to overcharge or burn out your batteries.
A charge controller can cost anywhere from $30 for a basic PWM model to several hundred dollars for an MPPT model with all the bells and whistles.
A suitable charge controller is crucial to the health and longevity of your battery bank.
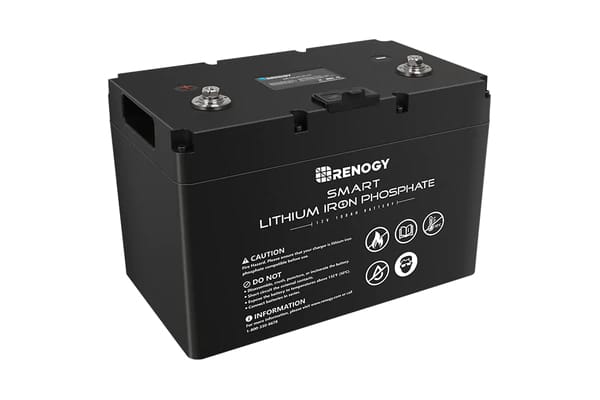
Battery
Consider several battery types when choosing a battery or battery bank for your solar power system. The two most common batteries used to store energy are Lead-Acid and lithium-Ion.
- Lead-Acid batteries are usually comprised of two primary types, Flooded and VRLA. VRLA is usually AGM or Gel. Lead-Acid batteries are popular because they are deep-cycle batteries that are not as expensive as other battery choices. However, both of these types of batteries require maintenance. For example, flooded batteries require watering and emissions maintenance, and the VRLA is sensitive to temperatures. Lead-Acid also takes about 14 hours to charge.
- Lithium-Ion batteries have become a popular choice for solar systems. They are low maintenance and faster to discharge. While they are more expensive, they have a much longer lifespan than other batteries. These batteries have high charge and discharge efficiencies but require circuits to regulate their current and voltage. These are a good choice if you use your solar-powered system intermittently since they don’t lose much capacity if they sit for periods.
Other types of batteries to consider are sodium Nickel Chloride and Nickel Cadmium.
Once you have chosen your battery, determine how many batteries you will need for your solar system. Unbound Solar has a good Battery Bank Calculator you can use.
A battery bank is a collection of connected batteries. Solar Power recharges the batteries, ready to draw energy from at night or on cloudy days.
When choosing your battery bank, you need to make sure that the voltage and amp-hours of the battery bank match those of your solar panels and inverter. Battery banks come in 12 volts, 24 volts, and 48 volts.
Inverter
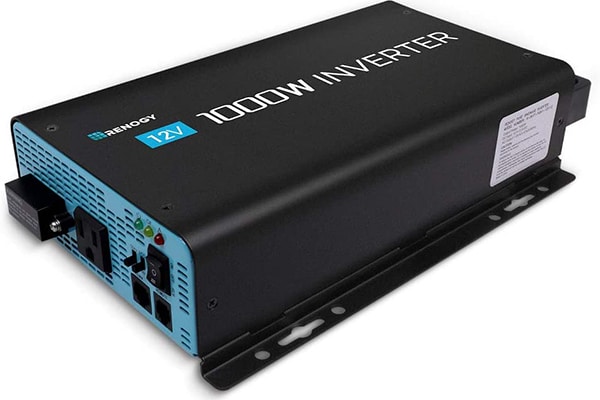
An inverter is an integral part of a solar power system. It converts DC (Direct Current) electricity from solar panels and batteries into AC (Alternating Current) electricity, which you can use in your home, on your RV, truck, boat, or with your tools.
Knowing how to choose an inverter for your particular system will be important.
There are two main inverters for DIY off-grid use: Pure Sinewave and Modified Sinewave.
There are several differences between the two types of inverters.
Pure Sinewave Inverters
- Usually, only make a low hum
- No electronic interference
- Safe for appliances and tools
- Efficiency is 90%-95%
- More expensive
Modified Sinewave Inverters
- It can be noisy and make a buzzing sound
- Interferes with other electronics – TVs, radios, computers, etc.
- Appliances might overheat
- Efficiency is 75%-85%
- Less expensive than Pure Sinewave
Pure sine wave inverters produce AC power similar to the current provided by your utility provider. These inverters come in low and high frequencies. Low frequencies are heavier due to the metal core and handle continuous loads and high peak surges. High frequency is better for intermittent use and does not handle as high a power surge as low-frequency pure sinewave inverters.
Modified sinewave inverters don’t produce a pure waveform. It is more “clunky,” so equipment does not run as smoothly. These are suitable inverters for construction equipment and essential appliances like lighting. These inverters are less expensive than pure sine wave inverters.
Building a DIY Solar System
Building a DIY solar system is not as simple as buying the components you need and putting them all together. Planning your system before making any purchases is essential.
It would help if you considered the needs of your home and the climate where you live. How often do you plan to use your system? What will the system power? How many peak sun hours do you receive? There are many more questions.
You will also need to make sure that all components are compatible and work together and that you can potentially expand them in the future if you want to develop your solar system.
Many companies offer pre-assembled DIY solar kits, which might be better if you are new to solar. You can even order a solar-powered generator to simplify your system further.
Make sure you have a good plan and consult with a professional if you have any questions.